Ellios Cheese Breadsticks are a delicious, convenient snack made with 100% real cheese, offering a crispy texture and flavorful experience. Perfect for quick meals or snacks, they combine quality ingredients with easy cooking methods, making them a popular choice for any occasion.
1.1 Overview of Ellios Cheese Breadsticks
Ellios Cheese Breadsticks are a tasty, pre-formed snack made with 100% real cheese, offering a crispy exterior and soft interior. Designed for convenience, they are easy to prepare using various cooking methods. Ideal for dipping or as a side, these breadsticks provide a satisfying cheesy flavor. Their versatility makes them a great option for quick meals, snacks, or pairing with favorite sauces.
1.2 Popularity and Convenience
Ellios Cheese Breadsticks are widely popular for their convenience and delicious taste. They offer an easy snack solution with minimal preparation, suitable for both quick meals and gatherings. Their pre-formed design and straightforward cooking instructions make them a favorite among busy households. With options to bake, air fry, or toast, they cater to diverse preferences, ensuring a crispy, cheesy treat that’s ready in minutes, making them a go-to choice for many.
Cooking Methods for Ellios Cheese Breadsticks
Ellios Cheese Breadsticks offer multiple cooking methods, such as oven, air fryer, and toaster oven, ensuring crispy results effortlessly for any meal or snack.
2.1 Oven Method
The oven method is a classic way to cook Ellios Cheese Breadsticks. Preheat your oven to 425°F (220°C). Remove the breadsticks from their packaging and place them directly on the middle rack. Bake for 11-14 minutes, or until golden brown. This method ensures a crispy exterior and a soft, cheesy interior. For crispier results, bake closer to 14 minutes. Perfect for achieving that golden, cheesy perfection every time!
- Preheat oven to 425°F (220°C).
- Place breadsticks directly on the middle rack.
- Bake for 11-14 minutes, or until golden brown.
2.2 Air Fryer Method
Cooking Ellios Cheese Breadsticks in the air fryer is quick and efficient. Preheat the air fryer to 400°F (200°C). Place the frozen breadsticks in a single layer, leaving space for even cooking. Cook for 6-10 minutes, shaking halfway through. For extra crispiness, lightly spray with olive oil or sprinkle with Parmesan before cooking. This method delivers a crispy exterior and a cheesy, soft interior in just a few minutes!
- Preheat air fryer to 400°F (200°C).
- Arrange breadsticks in a single layer.
- Cook for 6-10 minutes, shaking halfway.
2.3 Toaster Oven Method
Cooking Ellios Cheese Breadsticks in a toaster oven is simple and efficient. Preheat the toaster oven to 425°F (220°C). Place the frozen breadsticks on the middle rack or a non-stick baking sheet. Bake for 12-15 minutes, or until golden brown. For crispier breadsticks, place them directly on the rack; for softer ones, use a baking sheet. Ensure they reach an internal temperature of 160°F for food safety.
- Preheat toaster oven to 425°F (220°C).
- Place breadsticks on the rack or baking sheet.
- Bake for 12-15 minutes until golden.
2.4 Microwave Method
While the microwave method isn’t recommended for Ellios Cheese Breadsticks, it can work in a pinch. Place 1-2 breadsticks on a microwave-safe plate. Heat on high for 10-15 seconds per side. Check every 10 seconds to avoid overheating, as results may vary. Note that microwaving may not yield the same crispiness as other methods. For best texture, use the oven, air fryer, or toaster oven instead.
- Place 1-2 breadsticks on a microwave-safe plate.
- Heat on high for 10-15 seconds per side.
- Check frequently to prevent overheating.
Achieving the Perfect Texture
Achieve your desired texture by adjusting cooking time and temperature. Crispier breadsticks require longer baking, while softer ones need shorter time. Pat dry excess moisture for crispiness and use a wire rack for even cooking.
- Adjust cooking time for crispiness or softness.
- Pat dry moisture for crisper texture.
- Use a wire rack for even cooking.
3.1 Crispier Breadsticks
For crispier breadsticks, bake them at a higher temperature or for a slightly longer time. Place breadsticks directly on the oven rack to maximize crispiness. Pat dry any excess moisture before cooking to enhance crunch. Using a wire rack on a baking sheet can also help air circulate, ensuring even crispiness. Avoid overcrowding the baking surface for optimal results.
- Bake at higher temperatures for crunch.
- Place directly on oven rack.
- Pat dry excess moisture.
- Use a wire rack for air circulation.
3.2 Softer Breadsticks
For softer breadsticks, reduce cooking time and temperature. Place them on a nonstick baking sheet rather than directly on the oven rack. Covering with foil during baking can retain moisture, ensuring a softer texture. Avoid overcooking, as this leads to crispiness. Adjusting these factors allows you to achieve the perfect softness while maintaining flavor.
- Bake at a lower temperature.
- Use a nonstick baking sheet.
- Cover with foil during cooking.
- Monitor cooking time closely.
Food Safety and Quality
Ensure food safety by cooking to an internal temperature of 160°F. Never thaw breadsticks before cooking. Avoid undercooking to maintain quality and texture.
- Cook thoroughly to 160°F.
- Do not thaw before cooking.
4.1 Internal Temperature Requirements
To ensure food safety, Ellios Cheese Breadsticks must reach an internal temperature of 160°F. This step is crucial for eliminating harmful bacteria and maintaining product quality. Always use a food thermometer to verify the temperature, especially when cooking in ovens or air fryers. Proper cooking prevents undercooking and ensures a safe, enjoyable dining experience. Never consume breadsticks that are not fully cooked.
4.2 Handling and Storage Tips
Always handle Ellios Cheese Breadsticks safely by keeping them frozen until ready to cook. Do not thaw breadsticks before cooking, as this can affect texture and quality. After cooking, allow breadsticks to cool slightly before serving. Store leftovers in an airtight container in the refrigerator and consume within 24 hours. Never refreeze cooked breadsticks. Proper handling ensures freshness and prevents contamination, maintaining the product’s quality and safety standards.

Optional Toppings and Enhancements
Elevate your Ellios Cheese Breadsticks with optional toppings like freshly grated Parmesan, garlic butter sauce, or olive oil drizzled with herbs and spices for added flavor.
5.1 Parmesan Cheese
Freshly grated Parmesan cheese adds a rich, savory flavor to Ellios Cheese Breadsticks. Sprinkle it on before or after baking for a burst of authentic Italian taste. For the best results, use high-quality, freshly grated Parmesan instead of pre-packaged options, as it enhances the breadsticks’ natural cheesy flavor and texture. This simple enhancement elevates the dish, making it perfect for snacking or serving as an appetizer.
5.2 Garlic Butter Sauce
Garlic butter sauce is a delicious addition to Ellios Cheese Breadsticks, enhancing their flavor with a creamy, aromatic twist. To prepare, mix softened butter with garlic powder, basil, salt, and pepper. Brush the sauce onto the breadsticks after baking for a rich, savory finish. This topping adds moisture and depth, transforming the snack into a mouthwatering treat. It’s also a great dip for those who prefer an extra burst of flavor with every bite.
5.3 Olive Oil and Seasonings
Olive oil and seasonings offer a simple yet flavorful way to enhance Ellios Cheese Breadsticks. Lightly brushing the breadsticks with olive oil before cooking adds a subtle richness and helps seasonings adhere. Sprinkle with garlic powder, herbs, or Italian seasoning for extra flavor. This method allows for customization, letting you tailor the taste to your preferences while maintaining the breadsticks’ crispy texture and cheesy goodness.

Recipe Variations
Customize Ellios Cheese Breadsticks by using homemade pizza dough or enhancing with garlic butter sauce and herbs. These variations offer unique twists while maintaining their cheesy appeal.
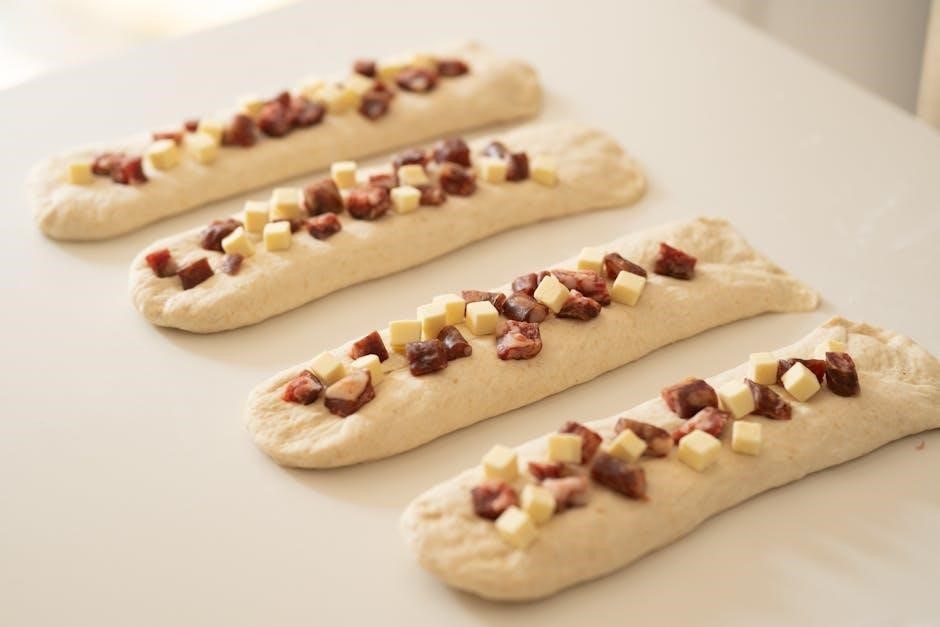
6.1 Homemade Pizza Dough Alternative
Transform homemade pizza dough into cheesy breadsticks for a fresh, customizable snack. Roll out dough, cut into strips, and bake until golden. Brush with garlic butter and sprinkle with Parmesan for extra flavor. This method allows for personalization, using your favorite herbs and seasonings. Perfect for a quick, delicious meal or appetizer, homemade dough ensures a soft, cheesy texture every time. Try it today for a tasty twist on traditional breadsticks!

6.2 Customizing with Herbs and Spices
Elevate your Ellios Cheese Breadsticks by adding fresh or dried herbs and spices for a personalized flavor. Sprinkle oregano, basil, or garlic powder before baking for an Italian-inspired twist. For a spicy kick, add red pepper flakes. Mix herbs into the dough for a deeper flavor or brush with olive oil and season before cooking. Experiment with combinations like rosemary and sea salt or smoked paprika for a unique taste. Customize to your liking for a delicious, one-of-a-kind snack.
Quick Recipe for Homemade Dough
Mix 1 1/8 tsp yeast, 1 tsp sugar, 3/4 cup warm water, and 1 1/2 Tbsp olive oil. Add 2 cups flour, knead until smooth, and let rise for 10 minutes. A simple, quick base for homemade cheese breadsticks.
7.1 Ingredients for Homemade Dough
The essential ingredients for homemade dough include 1 1/8 tsp active dry yeast, 1 tsp granulated sugar, 3/4 cup warm water, 1 1/2 Tbsp olive oil, and 2 cups all-purpose flour. These simple components create a smooth, elastic dough perfect for crafting cheese breadsticks. Ensure the yeast is active for proper rise, and use warm water to activate it effectively.
7.2 Step-by-Step Dough Preparation
Combine warm water, sugar, and yeast in a bowl. Let sit for 5-10 minutes until frothy. Add flour and olive oil, mixing until a dough forms. Knead on a floured surface for 5 minutes until smooth and elastic. Place in a greased bowl, cover, and let rise in a warm place for 1-2 hours, or until doubled in size. This preparation ensures a soft, pliable dough ready for shaping into breadsticks.

Serving Suggestions
Serve Ellios Cheese Breadsticks with marinara sauce, garlic butter, or ranch for dipping. Pair them with pasta, pizza, or salads for a satisfying meal or snack.
8.1 Dipping Sauces
Enhance your Ellios Cheese Breadsticks with a variety of dipping sauces for added flavor. Popular choices include marinara sauce, garlic butter, and ranch dressing. For a lighter option, olive oil with herbs or a side of warm garlic aioli works perfectly. These dips complement the cheesy goodness, creating a delightful combination that elevates the snacking experience to the next level.
8.2 Side Dishes and Meal Pairings
Ellios Cheese Breadsticks pair perfectly with a variety of side dishes and meals. Try serving them alongside a fresh green salad, tomato soup, or as a complement to pasta dishes. They also make a great accompaniment to homemade pizza or as a side for lasagna. For a quick meal, pair them with a hearty soup or a garden salad, ensuring a well-rounded and satisfying dining experience.
Troubleshooting Common Issues
Address common cooking issues like uneven cooking or overcooking by adjusting oven racks and monitoring bake times. Ensure breadsticks are evenly spaced for consistent results.
9.1 Uneven Cooking
Uneven cooking can occur due to poor air circulation or overcrowding. To fix this, ensure breadsticks are evenly spaced on the baking sheet or oven rack. Rotate the sheet halfway through cooking for consistent results. For air fryers, shake the basket midway to redistribute breadsticks. Monitor cooking times closely, as oven variations may affect outcomes. Adjusting placement and timing helps achieve uniform crispiness and texture across all breadsticks.
9.2 Overcooking or Burning
Overcooking or burning can occur if cooking times or temperatures are not monitored closely. To prevent this, keep an eye on the breadsticks during the final minutes of cooking. Reduce oven or air fryer temperatures slightly if browning too quickly. Ensure even cooking by spreading breadsticks out evenly and avoid overcrowding. Checking for a golden-brown color instead of waiting for dark browning helps prevent burning. Always use a food thermometer to confirm the internal temperature reaches 160°F for safety and quality.